Getting Started
Welcome! We’re excited that you’ve decided to learn mobx-state-router. This tutorial will guide you through building your first React app with mobx-state-router.
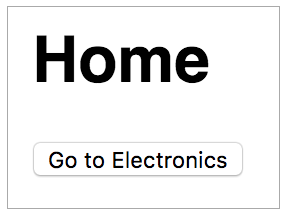
The finished app will consist of two simple pages: Home (shown below) and Electronics. Clicking the Go to Electronics button on the Home page will take you to the Electronics page. Clicking the Go Home button on the Electronics page will take you back to the Home page. That's it!
We have the finished example in Github, so if you get stuck, check out the working code there.
Create React App
Create a simple React app using create-react-app.
npx create-react-app quick-start --template typescript
cd quick-start
Install mobx-state-router
Install the router and its peer dependencies:
npm install --save mobx-state-router mobx mobx-react-lite
Note that mobx-state-router does not require you to switch all your state management to MobX. If you are already using other state management libraries in your app (such as Redux), you can continue to use them, only the router will use MobX.
Define Routes
Let's first define our routes. Create a file
src/initRouter.ts
and add three routes to it: home, department and notFound as shown below:
export const routes = [
    {
        name: 'home',
        pattern: '/',
    },
    {
        name: 'department',
        pattern: '/departments/:id',
    },
    {
        name: 'notFound',
        pattern: '/not-found',
    },
];
Create RouterStore and HistoryAdapter
Now add code in the same file (initRouter.ts) to create the router and the
history adapter.
import {
    browserHistory,
    createRouterState,
    HistoryAdapter,
    RouterStore,
} from 'mobx-state-router';

const notFound = createRouterState('notFound');

const routes = [
    // from above
];

export function initRouter() {
    const routerStore = new RouterStore(routes, notFound);

    // Observe history changes
    const historyAdapter = new HistoryAdapter(routerStore, browserHistory);
    historyAdapter.observeRouterStateChanges();

    return routerStore;
}
Note that RouterStore expects the routes and the notFound state as
constructor parameters.
The HistoryAdapter is responsible for keeping the browser address bar in sync
with the RouterState. It needs a
history object to manage the browser
history. While you can create an instance yourself, mobx-state-router provides
one for your convenience - it's called browserHistory. Let's just use it.
Create a viewMap
The viewMap is a simple structure that maps the routes to React components
(a.k.a. views). Let's map the three routes defined above to three views that we
will define later. Create a file
src/viewMap.tsx
and add the following viewMap to it:
import React from 'react';
import { DepartmentPage, HomePage, NotFoundPage } from './pages';

export const viewMap = {
    department: <DepartmentPage />,
    home: <HomePage />,
    notFound: <NotFoundPage />,
};
Provide routerStore to the React view hierarchy
Now we have the basic parts to assemble our application. Overwrite
src/App.tsx
with the contents below to provide routerStore to the React view hierarchy.
import React from 'react';
import { RouterContext, RouterView } from 'mobx-state-router';
import { initRouter } from './initRouter';
import { viewMap } from './viewMap';

export const App = () => {
    const routerStore = initRouter();

    return (
        <RouterContext.Provider value={routerStore}>
            <RouterView viewMap={viewMap} />
        </RouterContext.Provider>
    );
};
Here we give an instance of the RouterStore to RouterContext.Provider. While
you can create your own context, mobx-state-router gives you RouterContext for
your convenience. RouterContext.Provider now makes the routerStore available
to the entire view hierarchy below it.
In our case, the view hierarchy is created by the RouterView component, which
instantiates a UI component associated with the current router state. As the
router state changes, different components are instantiated based on the
mappings in the viewMap. The instantiated component (and its descendents) all
have access to the routerStore.
Create Views
Now let's create the views that we specified in viewMap. Here's the code for
the three views:
import React from 'react';
import { useRouterStore } from 'mobx-state-router';

export const HomePage = () => {
    const routerStore = useRouterStore();

    const handleClick = () => {
        routerStore.goTo('department', {
            params: { id: 'electronics' },
        });
    };

    return (
        <div>
            <h1>Home</h1>
            <button onClick={handleClick}>Go to Electronics</button>
        </div>
    );
};
The home page has a button that allows the user to navigate to the Electronics
department. Note that we are using the useRouterStore hook to access the
RouterStore. Remember the RouterStore that was provided to the view hierarchy in
App.tsx? When the user clicks the Go to Electronics button, we call
routerStore.goTo() to transition to the department route with parameter id
set to electronics.
import React from 'react';
import { useRouterStore } from 'mobx-state-router';

export const DepartmentPage = () => {
    const routerStore = useRouterStore();
    const { params } = routerStore.routerState;

    const handleClick = () => {
        routerStore.goTo('home');
    };

    return (
        <div>
            <h1>Welcome to {params.id}</h1>
            <button onClick={handleClick}>Go Home!</button>
        </div>
    );
};
The department page is very similar to the home page, the only difference is
that the Go Home! button here calls routerStore.goTo('home'), navigating
back to the home page.
import React from 'react';

export const NotFoundPage = () => {
    return <h1>Page Not Found</h1>;
};
This page simply displays "Page Not Found".
export * from './DepartmentPage';
export * from './HomePage';
export * from './NotFoundPage';
This file exports all the pages in the pages folder for access from outside.
Final Touches...
Overwrite
src/index.tsx
with the simplified version below. The important bit is the named import for
App (just a preference).
import React from 'react';
import ReactDOM from 'react-dom';
import { App } from './App';
import './index.css';

ReactDOM.render(
    <React.StrictMode>
        <App />
    </React.StrictMode>,
    document.getElementById('root')
);
Finally, overwrite src/index.css with the version below. This provides the styling we need for our pages.
body {
    margin: 0;
    padding: 16px;
    font-family: sans-serif;
}
Start Your App
Your React app is now ready for prime time! Execute npm start on your command
line and point your browser to http://localhost:3000. You will see the home
page. Click on the button to go to the Electronics page (watch the URL change).
Now enter an invalid URL in the browser address bar, e.g.
http://localhost:3000/junk. The router will automatically navigate to the not
found page.
Now that you have a taste of the basics, you can try out some advanced scenarios. Go to the Recipes section to explore. You can also look at the MobX Shop example for a more realistic app.